
 I have recently discovered Annie Sloan chalk paint. Yes I know, I must have been hiding under a rock not to have known about it before now. However when it did hit my radar it hit over and over and over! I actually happened on to it in Nashville by happy accident. Just browsing in a few cute shops when there seemed to be quite a buzz over a table of paint samples and quarts. The people in the shop didn't have to sell me the product because the customers did!!! They were gushing over this product and I had just read a blog about it. I heard them say things like; 'Amazing; no prep work; use on all surfaces; easy and fun; a little expensive but well worth it!; no fumes so you can do it in the house; water clean up; water thinning; " hmmmmmmmmmmmmm, all sounded good so I dove in head first! One quart of graphite paint, one can of clear wax and one can of dark wax and one wax brush. I was thinking 'this better be good cause it all totaled about $130!!! What was I thinking??!! What can I say??Enthusiasm is contagious!! This had better be good.
 I knew that my sweet daughter-in-law had inherited a couple of really beat up mahogany chests when she got my son. I mean as in tons of college moves and fraternity brutality!!! These chests are not identical but of the same style and they were good solid mahogany. 'Good Bones' if you will. When I heard 'no sanding or prep work' that got my attention. I have been known to skip critical steps before ( me impatient???) and this way there were not supposed to be any critical steps to skip!!! So we dove into this project.
 |
| This chest not in quite as bad shape as the other. |
 |
| Nice lines but terrible shape. |
 |
| Gouges and scrapes |
 |
| deep scrapes First step is to take off hardware , this is the only prep work we did. |
 |
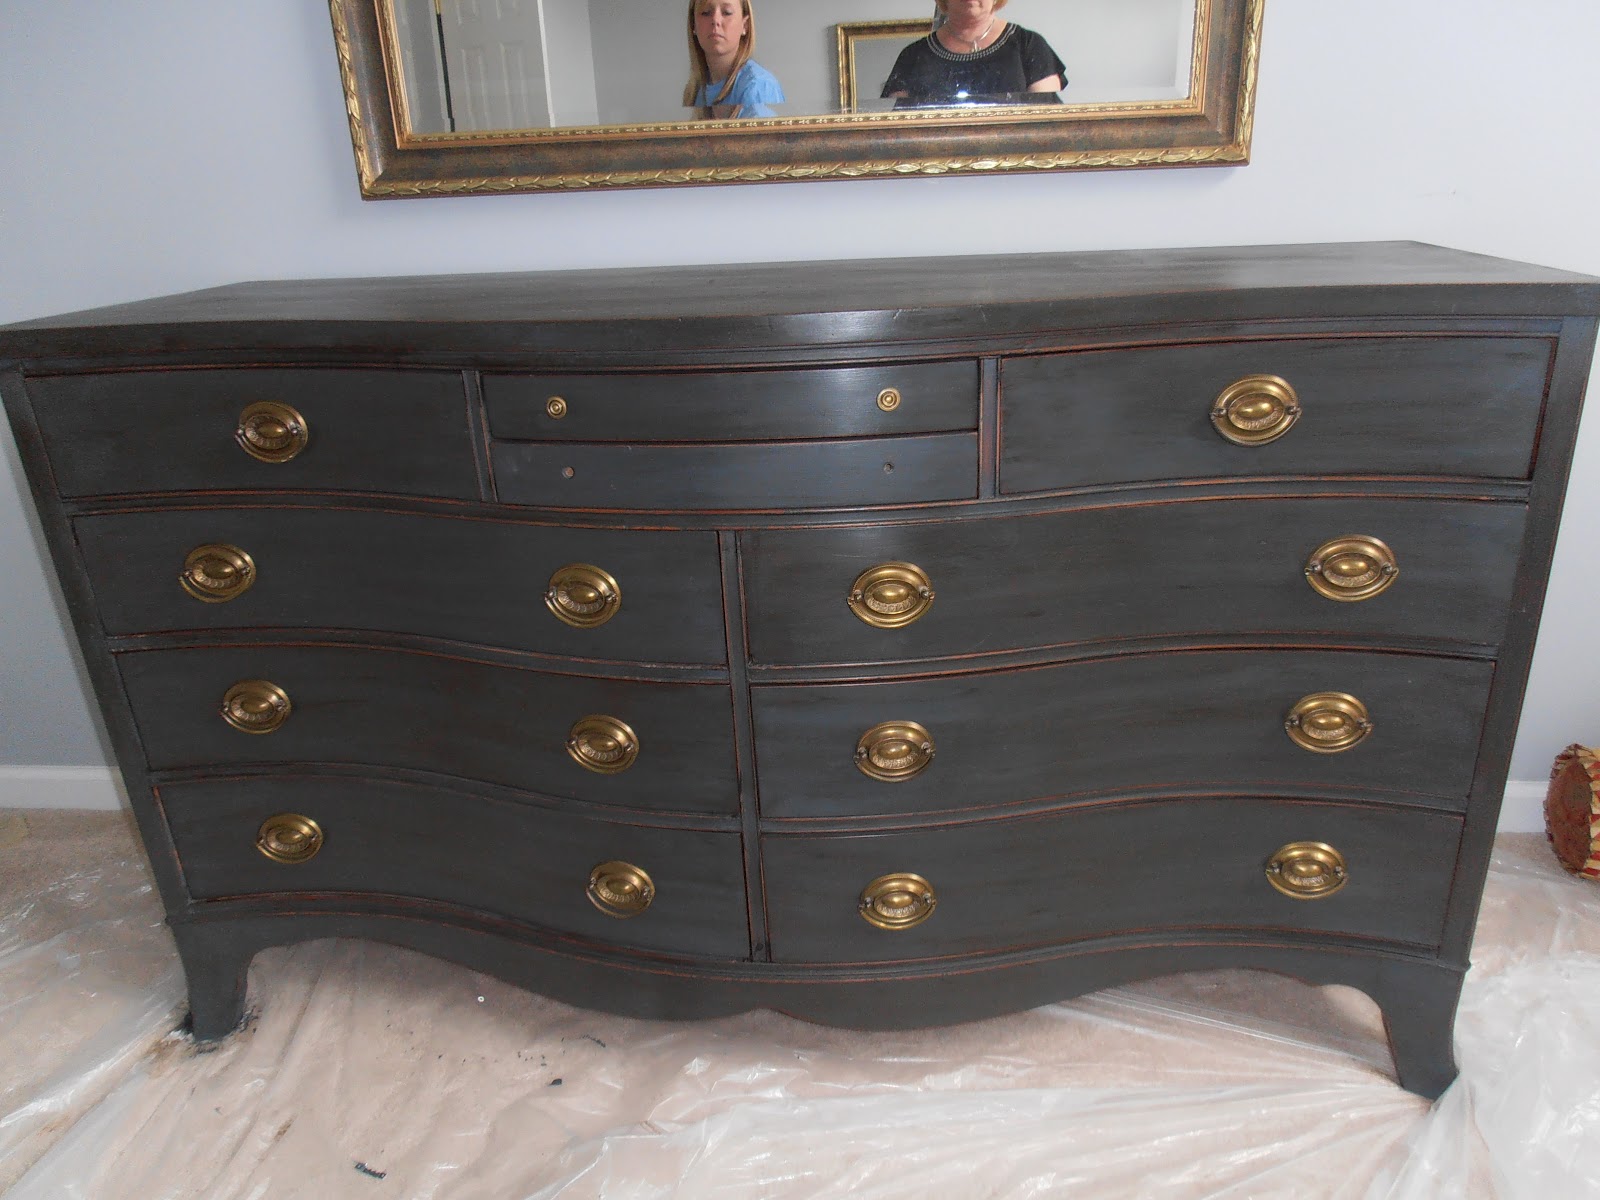
| After clear wax step. Cara with her 3 month 'baby bump'! Yes, #2 is due in December!! |
 |
| Dark wax step. |
The dark was is a little trickier. You wipe it on with the wax brush and very quickly wipe it down with a lint free cloth to get to the desired amount of antiquing you want. You much pay attention to the direction you wipe on this step. Always go with the grain. This wax dries very quickly so work in smaller areas at once. For instance just one drawer front at a time. When you get it the way you want it you let it dry and then biff to a soft sheen with a soft cloth. (We used microfiber from the auto store) Walah!!!!! Done!!
 | ||||||
|


No comments:
Post a Comment